
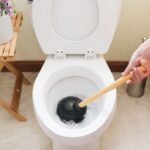
To unclog a toilet with a plunger, use a flange plunger to create a tight seal over the drain, then apply steady push-pull pressure to dislodge the blockage. Correct technique, proper water level, and consistent force are essential for clearing the clog quickly and effectively.
Toilet clogs are one of the most common household problems, and using a plunger is the fastest and most effective solution when done correctly. However, many people fail because they use the wrong plunger, apply incorrect pressure, or misunderstand how the mechanism works. This guide from Homeaholic explains the complete system so you can fix the issue properly on the first attempt.
What Causes a Toilet to Clog?
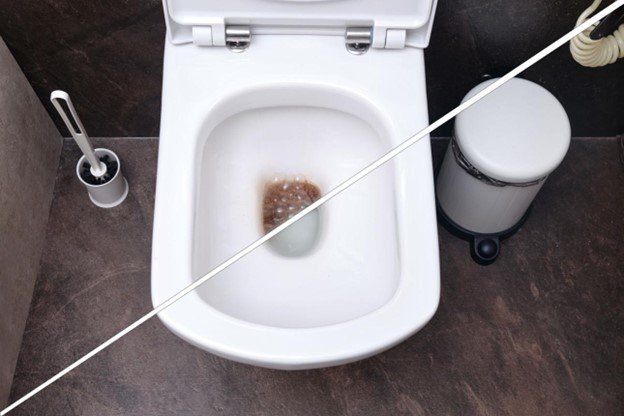
Toilet clogs occur when waste material, paper, or foreign objects block the flow of water through the drain pipe. The toilet system relies on gravity and water pressure to move waste through the trap, and any obstruction disrupts this process, leading to backup or slow drainage.
Clogs are not all the same, and understanding the cause helps determine how easily they can be fixed. Some clogs are soft and easy to break apart, while others are dense or lodged deeper in the pipe, requiring more effort or different tools.
Common Causes of Toilet Clogs
- Excessive toilet paper buildup
- Non-flushable items (wipes, tissues, hygiene products)
- Low water flow or weak flush pressure
- Hard waste accumulation
- Foreign objects blocking the trap
Key Insight
- Soft clogs → easy to remove with plunger
- Dense clogs → require stronger pressure
- Deep clogs → may need alternative methods
Understanding the type of clog allows you to apply the correct solution instead of using random force that may worsen the blockage.
What Type of Plunger Should You Use?
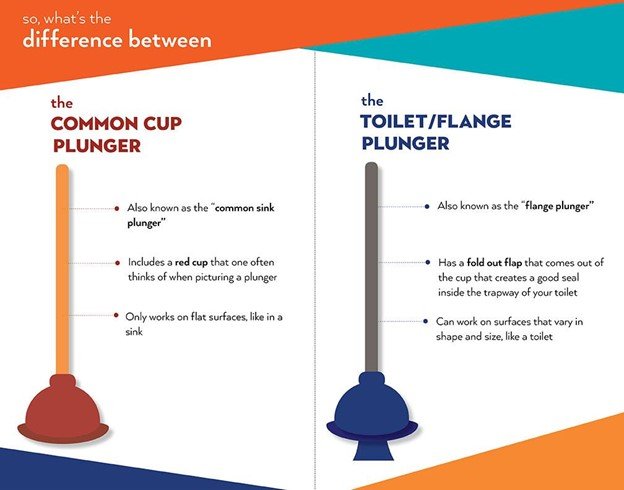
Not all plungers are designed for toilets. Using the wrong type significantly reduces effectiveness and often leads to failure, even if the technique is correct.
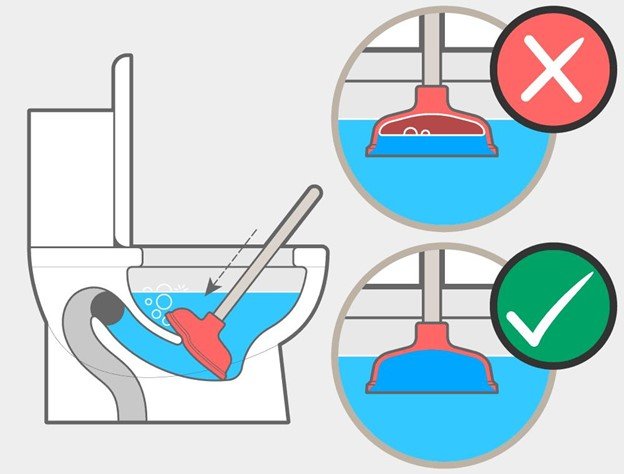
The best tool for unclogging a toilet is a flange plunger, which includes an extended rubber flap that fits into the toilet drain opening. This design creates a stronger seal and allows better pressure transfer compared to flat cup plungers.
Types of Plungers
- Flange plunger
- Designed specifically for toilets
- Creates tight seal
- Most effective for clogs
- Cup plunger
- Flat bottom design
- Works better for sinks
- Poor seal on toilets
Why the Right Plunger Matters
- Better seal = stronger pressure
- Stronger pressure = faster unclogging
- Poor seal = wasted effort
Using a flange plunger ensures that all applied force is directed into the blockage rather than escaping around the edges.
How Does a Plunger Actually Work?
A plunger works by creating pressure changes inside the drain system. When you push down, it forces water into the pipe, and when you pull back, it creates suction. This alternating pressure loosens and dislodges the clog.
The effectiveness of a plunger depends on maintaining a proper seal and using controlled force. Without a seal, pressure escapes, making plunging ineffective regardless of effort.
Pressure Mechanism
- Downward push → compresses water into pipe
- Upward pull → creates suction
- Repeated motion → loosens blockage
Why Water Matters
- Water transfers pressure better than air
- Low water level reduces effectiveness
- Proper water level improves force delivery
Key Insight
Plunging is not about force alone. It is about controlled pressure cycles that gradually break apart or shift the clog until water flow is restored.
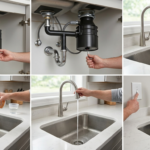
Ideal Water Level for Effective Plunging
Water level plays a critical role in how effectively a plunger works. Since plunging relies on pressure transfer, the presence of sufficient water ensures that force is directed into the clog rather than dissipating through air gaps. Without proper water coverage, even perfect technique becomes ineffective.
Maintaining the correct water level ensures consistent pressure cycles and prevents unnecessary splashing or overflow. Adjusting water before plunging is a simple step that dramatically improves results and reduces effort required to clear the blockage.
Water Level Guidelines
- Too low
- Plunger not fully submerged
- Weak pressure transfer
- Ideal level
- Covers entire plunger head
- Maximizes pressure efficiency
- Too high
- Risk of overflow
- Reduce level before plunging
Practical Adjustments
- Add water if level is too low
- Remove excess water if near overflow
- Always ensure full rubber seal coverage
Key Insight
- Water = pressure medium
- Correct level = stronger unclogging force
- Small adjustment → major performance gain
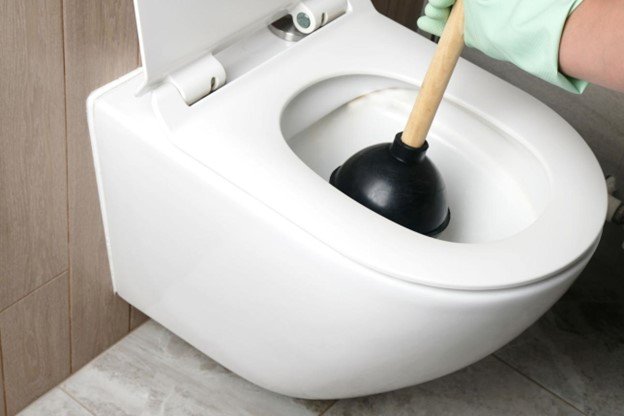
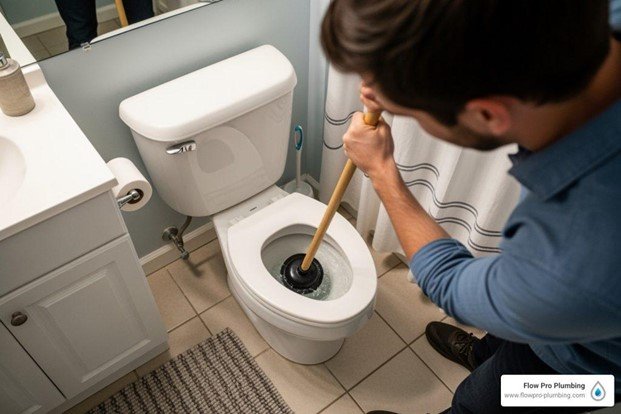
How to Unclog a Toilet with a Plunger (Step-by-Step)
Using a plunger correctly requires following a specific sequence to maximize effectiveness. Skipping steps or rushing the process often leads to failure.
Start by positioning the plunger correctly and ensuring there is enough water in the bowl to cover the rubber head. This allows proper pressure transfer during plunging.
Step-by-Step Process
- Place plunger over drain opening
- Ensure full seal with no air gaps
- Push down slowly to remove trapped air
- Begin firm push-pull motion
- Repeat 10–15 times consistently
- Test flush to check clearance
Technique Tips
- Start gently to avoid splashing
- Maintain vertical alignment
- Use steady rhythm, not random force
Key Insight
Consistency matters more than strength. Proper technique ensures that each movement contributes to clearing the clog instead of wasting effort.
Toilet Unclogging Decision System (Fast Diagnosis Flow)
Unclogging success depends on making the right decision at the right moment rather than repeating the same action blindly. Most users continue plunging without diagnosing what is actually happening inside the drain system. A simple decision flow helps identify whether to continue, adjust technique, or switch methods, saving time and preventing overflow or further blockage.
This system works by observing water behavior, resistance, and response to pressure. Each outcome signals a different action, allowing you to move forward logically instead of guessing. Following a structured approach increases success rate and avoids unnecessary effort or damage.
Fast Decision Flow
- If water level is rising
- Stop immediately
- Wait for level to stabilize before continuing
- If no movement occurs
- Check plunger seal
- Reposition and restart
- If water drains slowly
- Continue plunging in cycles
- Clog is loosening
- If no success after multiple attempts
- Switch to auger or alternative method
Key Insight
- Observation → decision → action
- Random plunging reduces effectiveness
- A clear system improves success speed
Why Your Plunger Is Not Working
If a plunger fails, the issue is usually related to technique, tool selection, or clog type. Identifying the problem helps correct the approach.
Most failures occur due to poor sealing, insufficient pressure, or attempting to clear a clog that is too deep for a plunger to reach.
Common Reasons for Failure
- Using wrong plunger type
- Incomplete seal around drain
- Not enough water in bowl
- Weak or inconsistent plunging
- Deep or solid blockage
How to Fix It
- Switch to flange plunger
- Adjust water level
- Improve sealing position
- Apply steady pressure cycles
Key Insight
Plunger failure is rarely due to the tool itself. It is usually a result of incorrect usage or unsuitable conditions.
How to Fix Different Types of Toilet Clogs
Different clogs require different approaches. Understanding the type of blockage helps you adjust technique for better results.
Soft clogs respond quickly to plunging, while dense or deep clogs require more time and stronger pressure.
Clog Types and Solutions
- Soft clog
- Caused by paper or waste
- Easy to break apart
- Requires light plunging
- Dense clog
- Thick buildup
- Requires stronger pressure
- Multiple cycles needed
- Deep clog
- Located beyond trap
- Plunger less effective
- May need auger
Key Insight
Matching the technique to the clog type improves efficiency and prevents unnecessary effort.
What Mistakes Should You Avoid When Plunging?
Common mistakes reduce effectiveness and can make the clog worse. Avoiding these errors ensures faster results.
Many users focus on force instead of technique, leading to splashing, poor sealing, and ineffective pressure application.
Common Mistakes
- Using cup plunger instead of flange
- Applying random force
- Not maintaining seal
- Plunging too aggressively
- Ignoring water level
Correct Approach
- Focus on seal first
- Use controlled motion
- Maintain consistency
Key Insight
Precision is more important than strength when using a plunger.
When Should You Stop and Try Another Method?
Plunging is effective for most clogs, but not all. Knowing when to stop prevents damage and saves time.
If multiple attempts fail, the blockage may be too deep or solid for a plunger to handle.
Signs to Stop
- No improvement after several cycles
- Water level remains unchanged
- Repeated clogging
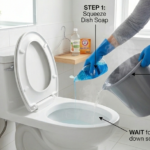
Alternative Methods
- Toilet auger
- Hot water and soap
- Professional plumbing
Key Insight
Continuing ineffective plunging wastes effort and may worsen the blockage.
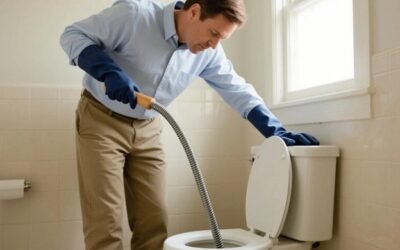
When a Plunger Will Not Work (Know the Limit)
A plunger is highly effective for most soft clogs, but it has clear limitations. Continuing to plunge when the blockage cannot be moved wastes time and may worsen the situation by compacting the clog further into the pipe. Recognizing these limits helps you switch to the correct tool at the right time.
Understanding when a plunger will fail is just as important as knowing how to use it. Some blockages require mechanical removal or professional intervention, and identifying them early prevents unnecessary effort and potential plumbing damage.
Situations Where Plungers Fail
- Hard objects lodged in trap
- Deep clogs beyond reach
- Grease or solid buildup
- Repeated clogging without change
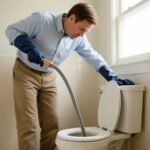
What to Do Instead
- Use a toilet auger for deeper reach
- Apply alternative methods (soap + hot water)
- Call a plumber for severe blockage
Key Insight
- Plunger = pressure tool, not removal tool
- Some clogs require mechanical extraction
- Knowing limits saves time and prevents damage
Can Plunging Damage Your Toilet?
Plunging is generally safe, but excessive force or incorrect technique can cause issues.
Applying too much pressure or using improper tools may damage seals or create splashes.
Potential Risks
- Splashing contaminated water
- Damaging toilet seal
- Cracking porcelain (rare)
Safe Practices
- Use moderate force
- Maintain proper alignment
- Avoid sudden aggressive pushes
Key Insight
Controlled technique ensures safety and effectiveness.
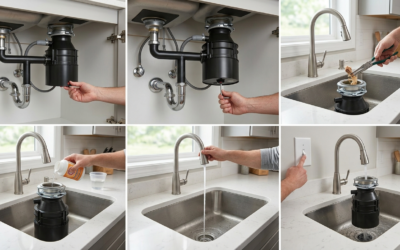
What to Do After Successfully Unclogging
Once the clog is cleared, proper follow-up ensures that the problem does not return.
Flush the toilet to confirm normal flow and check for any remaining resistance.
Post-Unclog Steps
- Flush multiple times
- Clean plunger properly
- Monitor drainage
- Avoid excessive paper use
Prevention Tips
- Use less toilet paper
- Avoid flushing non-flushable items
- Maintain regular cleaning
Key Insight
Prevention is easier than fixing repeated clogs.
Toilet Clog Prevention System (Simple Daily Routine)
Preventing clogs is far easier than fixing them repeatedly. Most toilet blockages are caused by improper usage habits rather than system failure. A structured prevention routine reduces clog frequency and keeps the plumbing system functioning smoothly.
By following a few consistent habits, you can significantly reduce the chances of future clogs. Prevention focuses on controlling what enters the system and maintaining proper flushing behavior over time.
Daily Prevention Rules
- Use moderate amounts of toilet paper
- Avoid flushing non-flushable items
- Flush immediately after use
Weekly Maintenance
- Flush with hot water occasionally
- Use mild cleaning agents
- Monitor drainage speed
Long-Term Habits
- Educate household members
- Avoid overloading the toilet
- Address slow drainage early
Key Insight
- Most clogs are preventable
- Consistency reduces long-term issues
- Prevention = less effort + lower risk
Real-World Case Study: Failed vs Correct Plunging
A user attempted to unclog a toilet using a standard cup plunger and applied aggressive force repeatedly, expecting the blockage to clear quickly. Despite multiple attempts, the clog remained unchanged, and water levels fluctuated without any real progress. The issue was not the severity of the clog but the incorrect approach, specifically the inability to create a proper seal and generate effective pressure inside the drain system.
The user initially relied on strength rather than technique, which caused pressure to escape around the edges of the plunger. After switching to a flange plunger and applying controlled push-pull motion, the situation changed immediately. Within a few consistent cycles, the clog loosened and cleared, restoring normal water flow. This shift demonstrated that proper sealing and pressure control are far more important than force when using a plunger.
Breakdown of the Scenario
- Initial attempt → cup plunger + aggressive force
- Core problem → poor seal, pressure leakage
- Technical failure → ineffective push-pull cycle
- Adjustment → switched to flange plunger
- Technique change → controlled, rhythmic pressure
- Outcome → clog cleared within minutes
What Changed in the Successful Attempt
- Seal was fully secured over drain opening
- Air was eliminated before pressure cycles began
- Push-pull motion created alternating pressure
- Consistency replaced random force
Key Takeaway
- Force without seal = no pressure
- Pressure without consistency = no results
- Technique is the primary success factor
Expert Insight
Most toilet unclogging failures are not caused by difficult clogs but by incorrect technique and misunderstanding of how plunging works. The plunger is a pressure-based tool, not a force-based one. Without a proper seal, even the strongest effort becomes ineffective because the pressure escapes instead of being directed into the blockage.
From a practical standpoint, the success of plunging depends on three critical variables: seal quality, pressure control, and repetition. When these elements are aligned, even stubborn clogs can be cleared efficiently. When they are not, even simple clogs may persist despite repeated attempts.
Expert Recommendations
- Always use a flange plunger for toilets
- Ensure full seal before applying force
- Start slowly to remove trapped air
- Use steady push-pull cycles instead of random force
- Maintain consistent rhythm for maximum pressure effect
Strategic Insight from Homeaholic
- Technique determines outcome more than tool strength
- Proper method reduces time and effort significantly
- Understanding pressure mechanics improves success rate
Homeaholic recommends treating plunging as a controlled mechanical process rather than a physical effort. When users shift from force to technique, they not only solve the immediate problem but also gain a repeatable system for handling future clogs efficiently and confidently.
How Long Should It Take to Unclog a Toilet?
Time expectations help determine whether your method is working or if adjustments are needed. Many users either give up too early or continue plunging for too long without results. Understanding typical timeframes provides a benchmark for evaluating progress.
Most toilet clogs can be cleared within minutes when the correct technique is applied. If the process takes significantly longer, it usually indicates either incorrect technique or a more complex blockage that requires a different approach.
Time Expectations
- Simple clog
- 1–2 minutes
- clears quickly with proper technique
- Moderate clog
- 3–5 minutes
- requires repeated cycles
- Difficult clog
- 5–10+ minutes
- may need alternative method
Warning Signs
- no change after 10 minutes
- repeated water backup
- clog returns quickly
Key Insight
- Time = diagnostic tool
- Longer time = deeper problem
- Use time to decide next step
FAQ Section
Why won’t my toilet unclog with a plunger?
Usually due to poor seal or incorrect technique.
What is the best plunger for toilets?
Flange plunger.
How long should I plunge?
10–20 seconds per cycle.
Can plunging damage pipes?
Not if done correctly.


0 Comments